Thoughts on The Merchant and Mills Ottoline Jacket

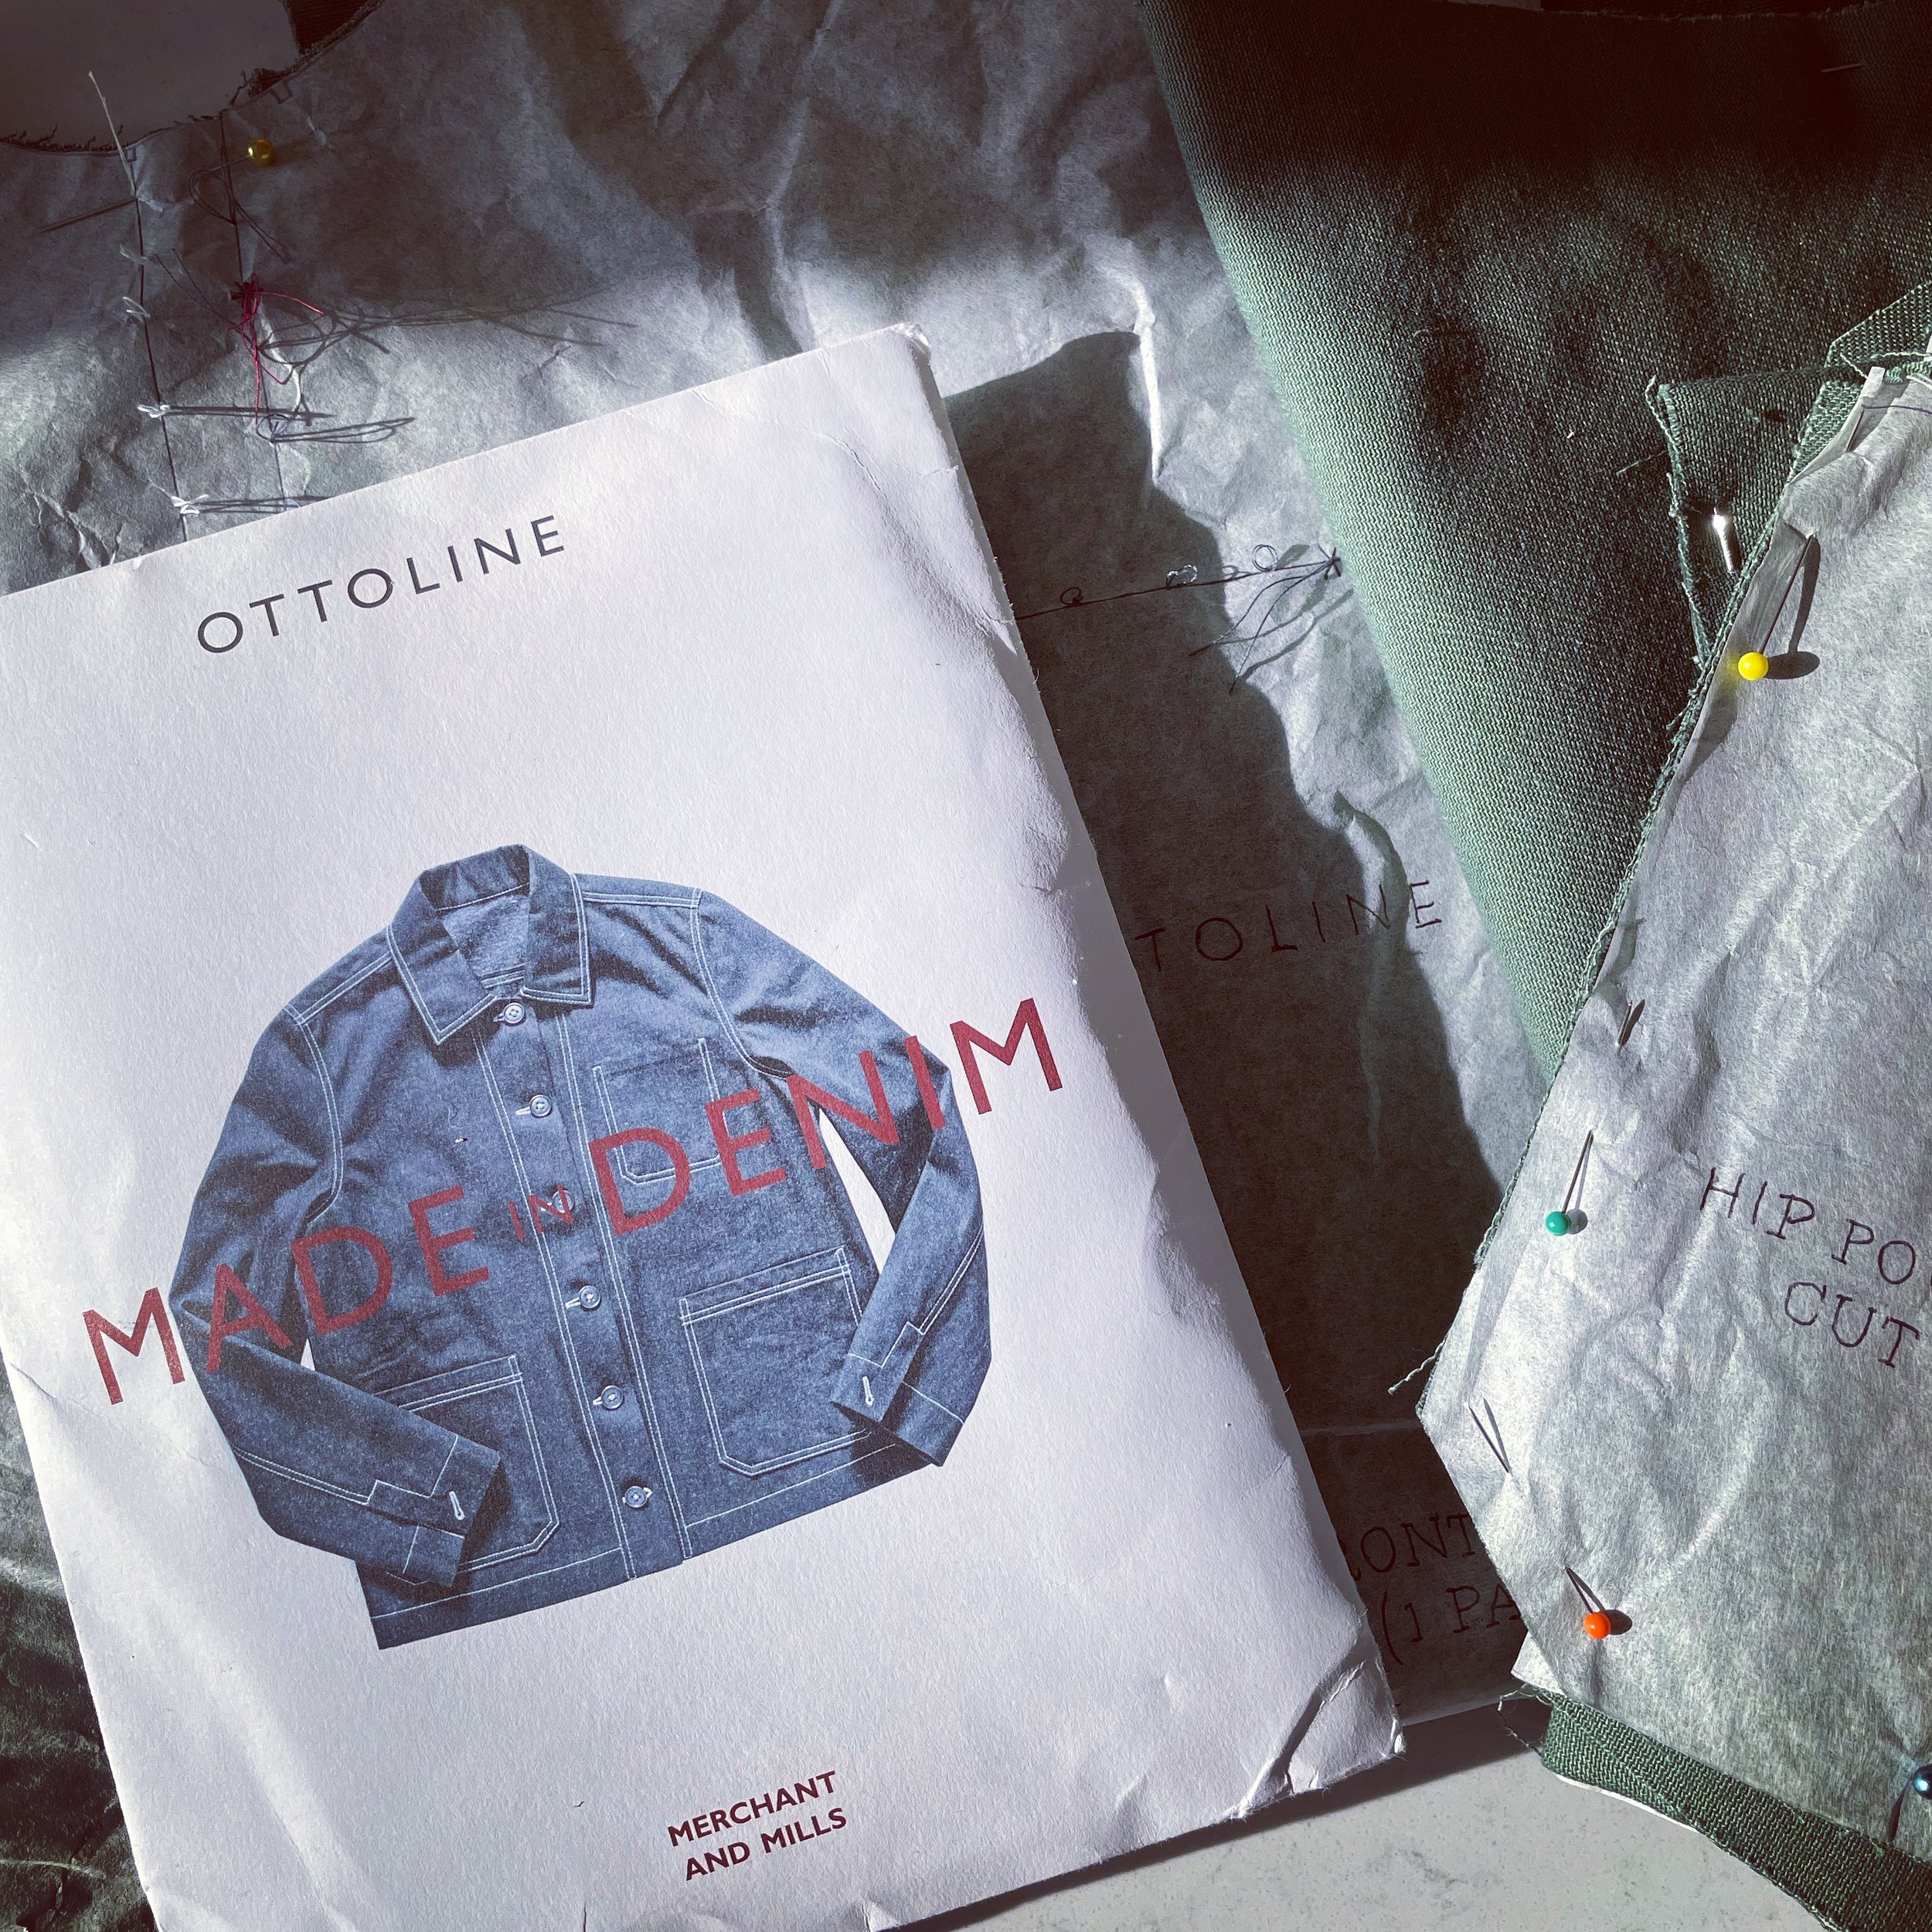
The Ottoline Jacket from Merchant & Mills
If you’re looking for a casual, boxy, utilitarian jacket with some interesting details, then the Ottoline from Merchant & Mills could be a good choice.
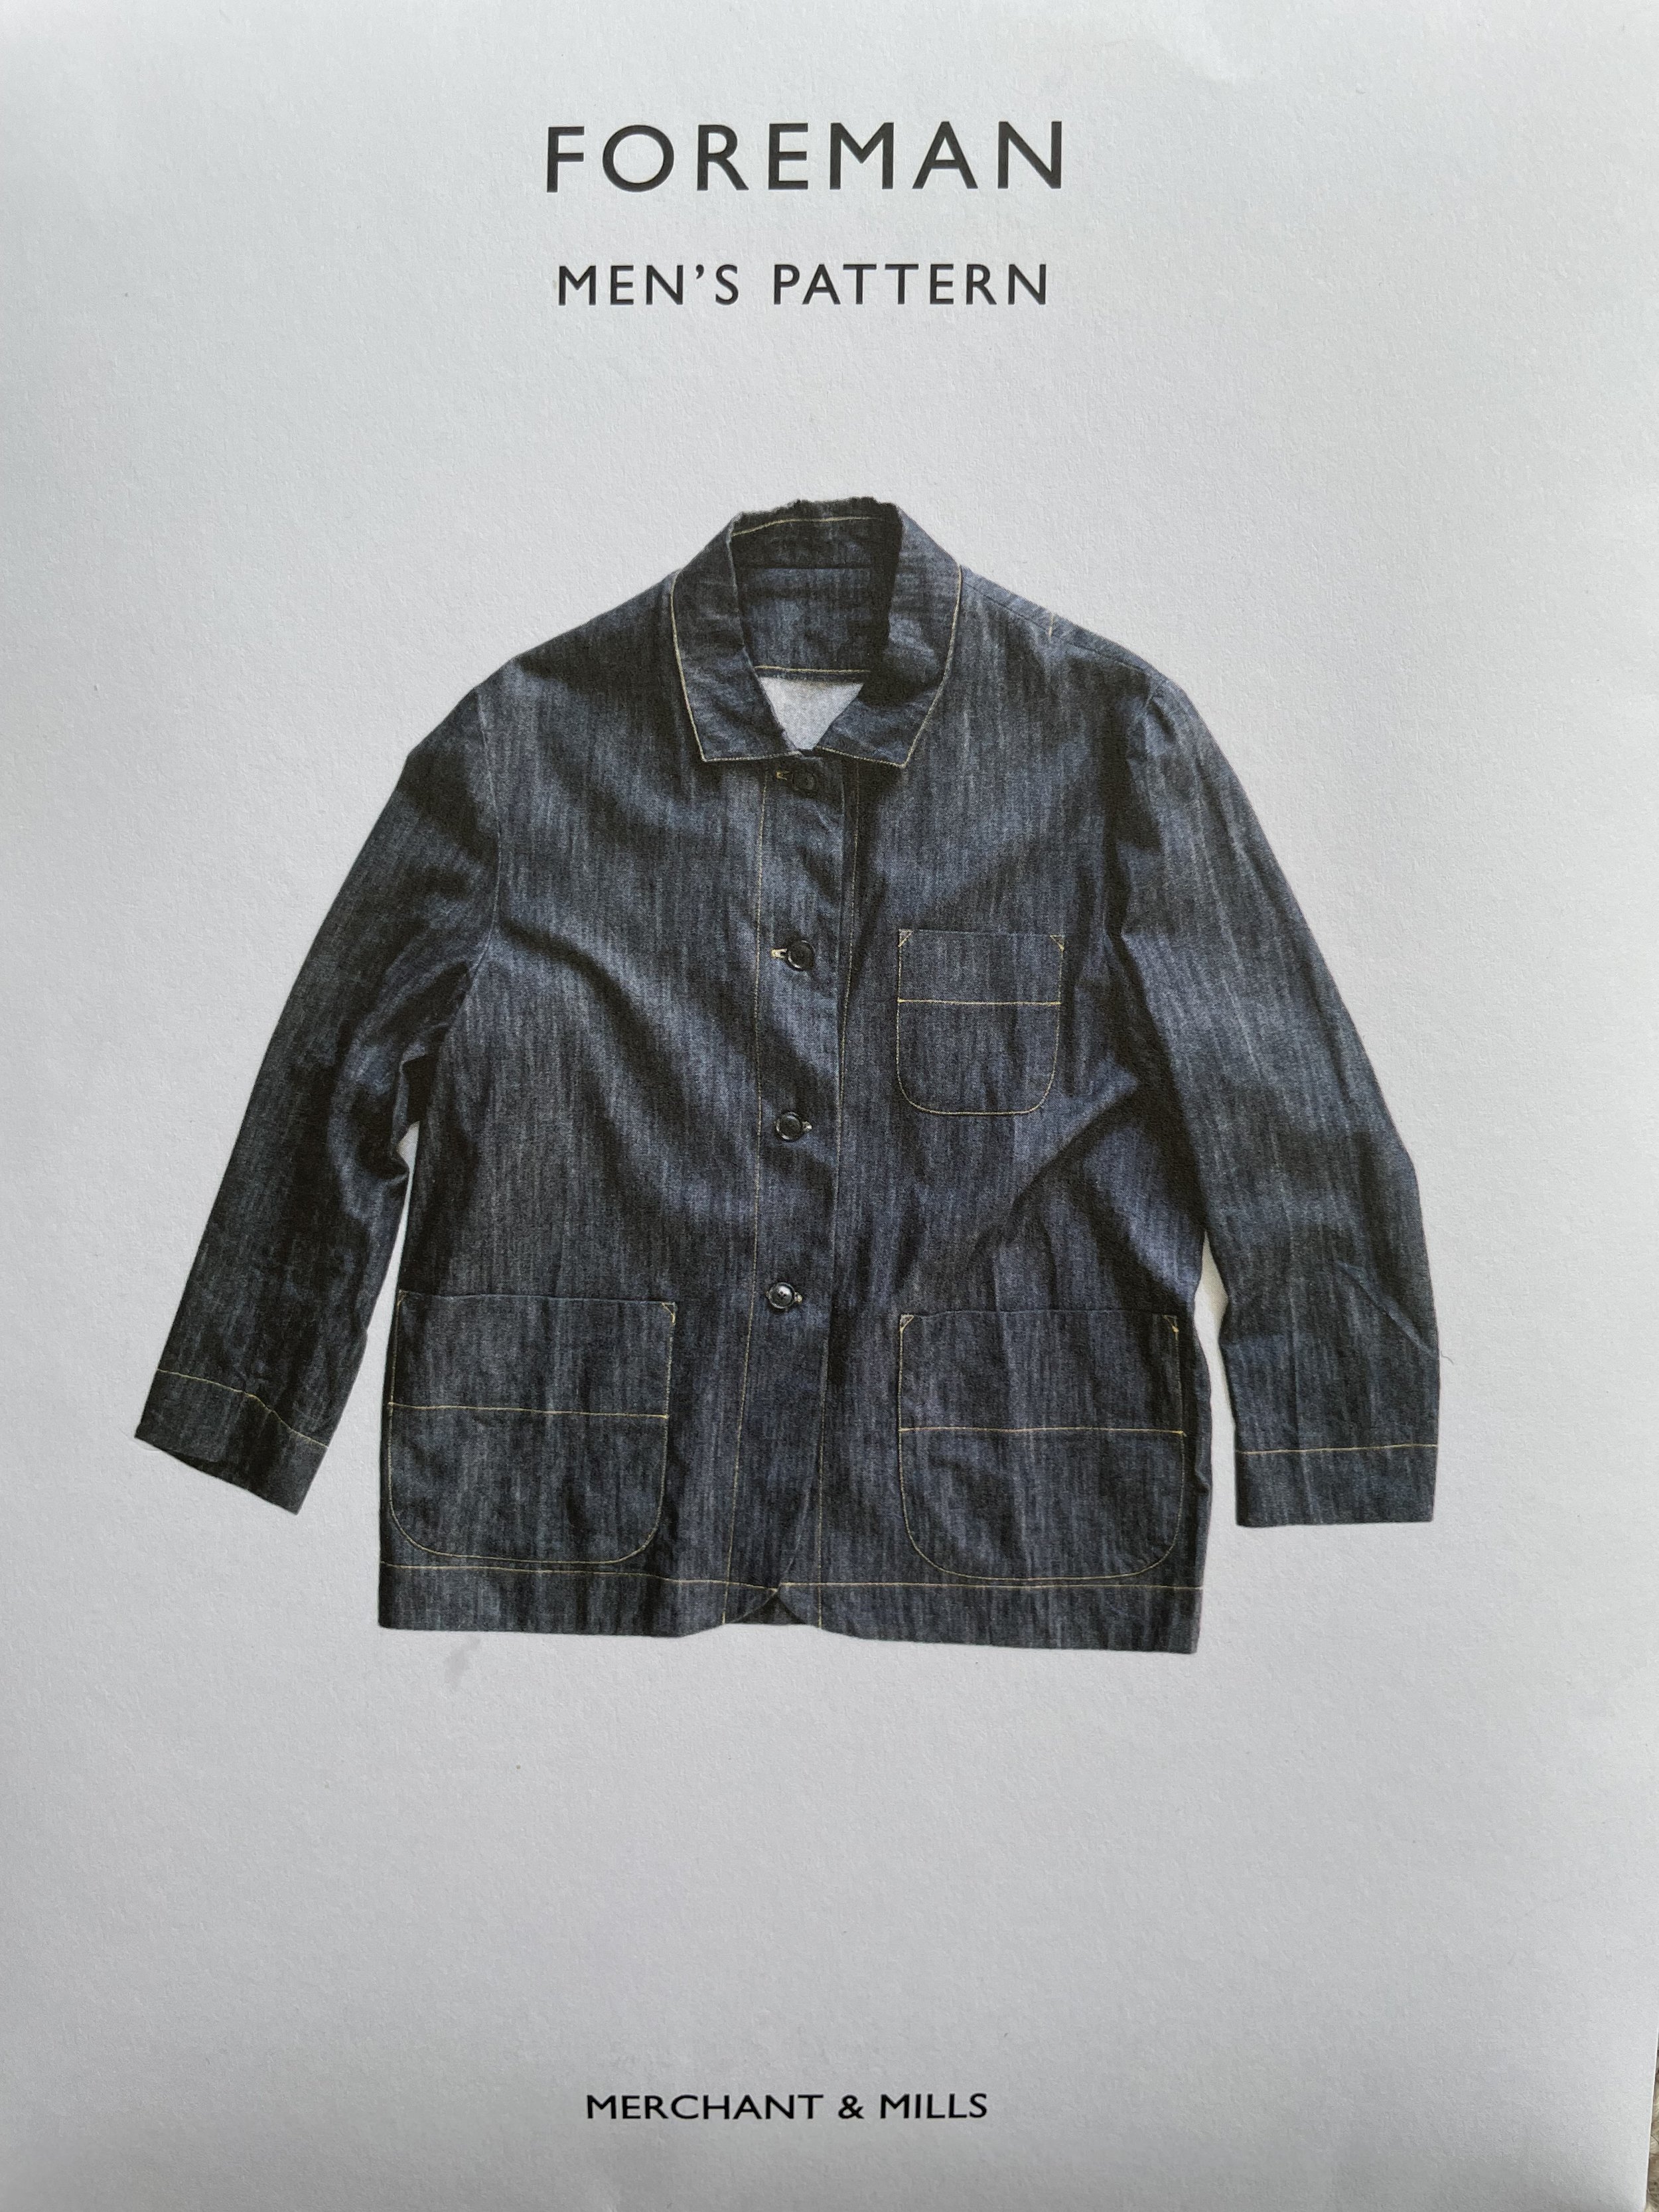
I’d already had some success with the M&M men’s Foreman jacket and thought that the Ottoline was kind of the female equivalent, but it’s not – there are a number of noticeable differences, despite it looking very similar on the pattern envelope. I would describe the Foreman as quite traditional in its style and construction; it has separate interfaced facings, an interfaced collar stand, under collar, plus a separate top collar and the collar is attached early on and then sandwiched between the front and neck and the facing.
The Ottoline, on the other hand, doesn’t! the collar is cut in one piece and then folded in half to form the top and under collar, there is no collar stand, the front facings are cut as one with the jacket and then folded back and there is no recommendation to interface – not anywhere! Finally, the collar is attached when the jacket is almost complete.
I have to say, as a stickler for details, I prefer the construction of the Foreman, but the Ottoline was probably a more interesting make due to its unusual assembly. I do take issue with the lack of interfacing though; this may work satisfactorily if you are using a heavy fabric such as denim or oilskin, but seeing that Merchant & Mills also recommends fabrics such as linen, you would need to interface. I used a sage green cotton twill from Guthrie & Ghani and interfaced the front facings, half the collar and the buttonholes on the sleeve vents and was glad I did. Even if you choose not to interface these areas, I would still recommend interfacing the buttonholes as several people have mentioned that – with hindsight – they wished they had.

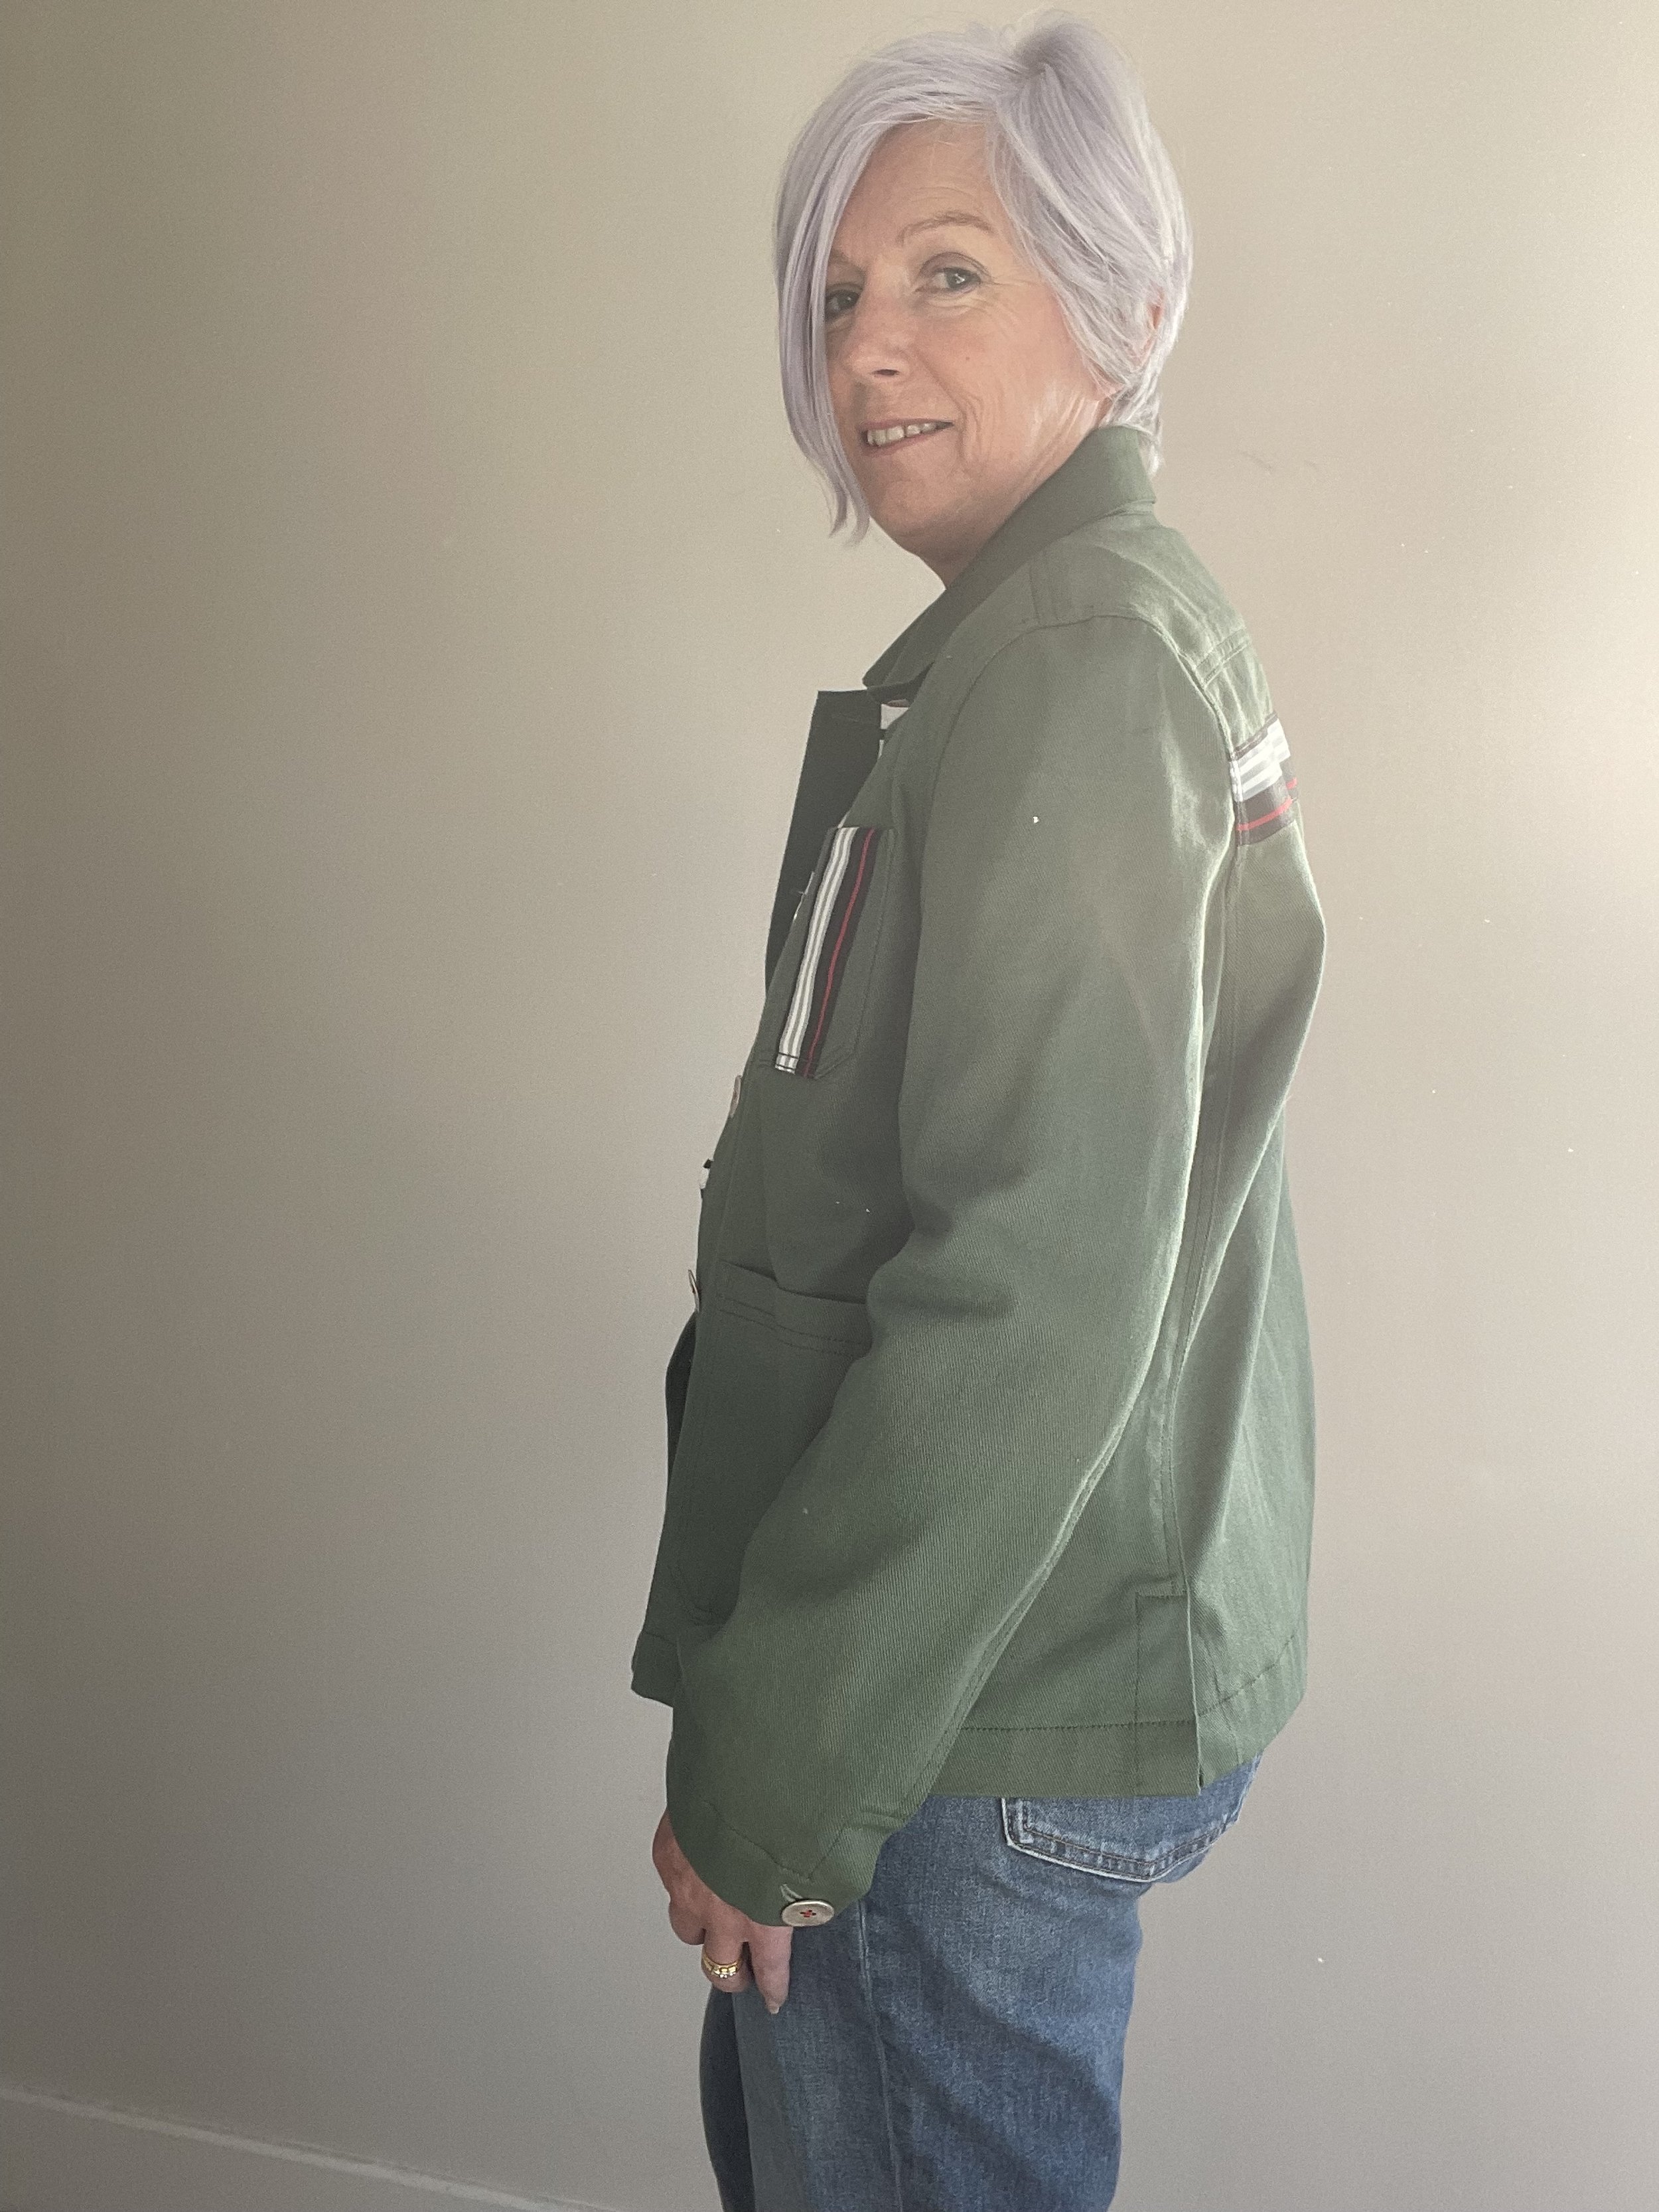
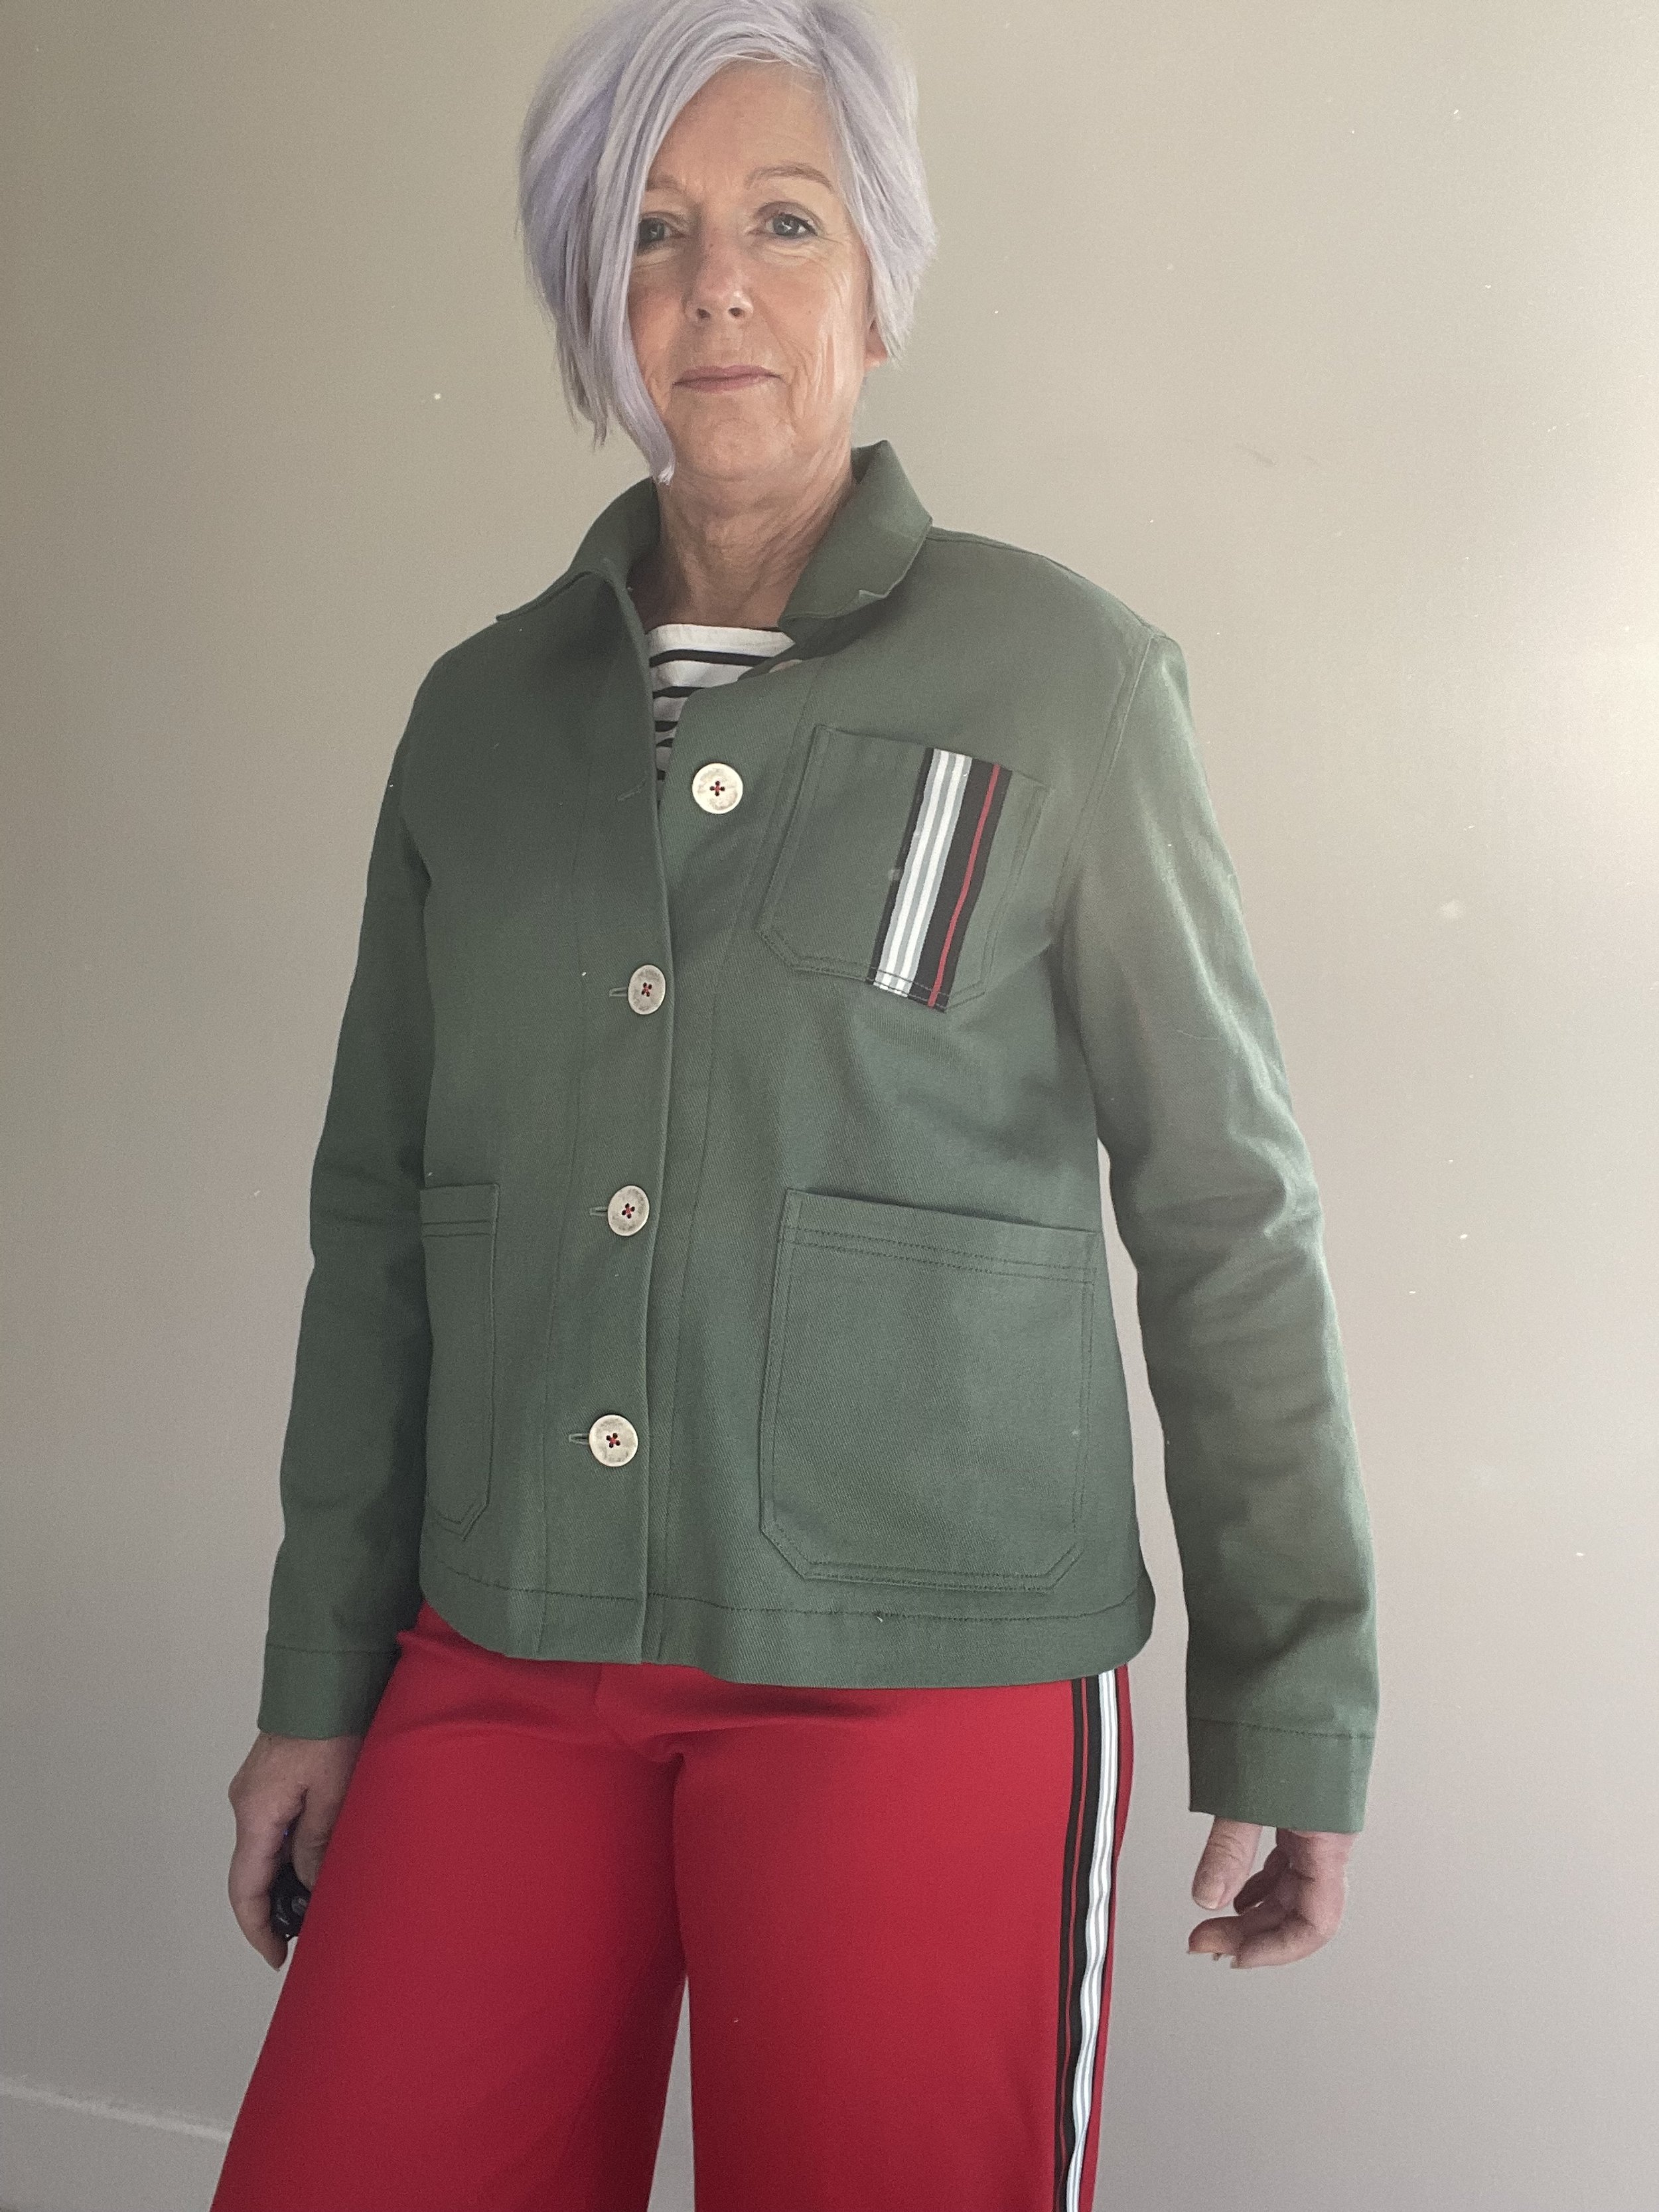
It’s suggested that the breast pocket on the Ottoline should be internal with just the topstitching visible on the right side of the jacket. Here it’s been attached to the front of the jacket, which allowed me to make a feature of it with the addition of a striped grosgrain ribbon
As I mentioned earlier, the order of construction is interesting and keeps you on your toes. There’s a danger that I’ll get bogged down in detail here, but I’ll try and keep it simple. As expected, the patch pockets are attached first and then topstitched. The pattern recommends an internal breast pocket so just the topstitching is visible on the right side – I didn’t think I would use this, so I attached the pocket to the right side because a) it looks better imo and b) it’s more practical for me. The front facings are then folded back right sides together, and stitched at the neck edge 0.5cm past the notch. You then snip into the neck edge at the end of this stitching; this will all become clear when you attach the collar.

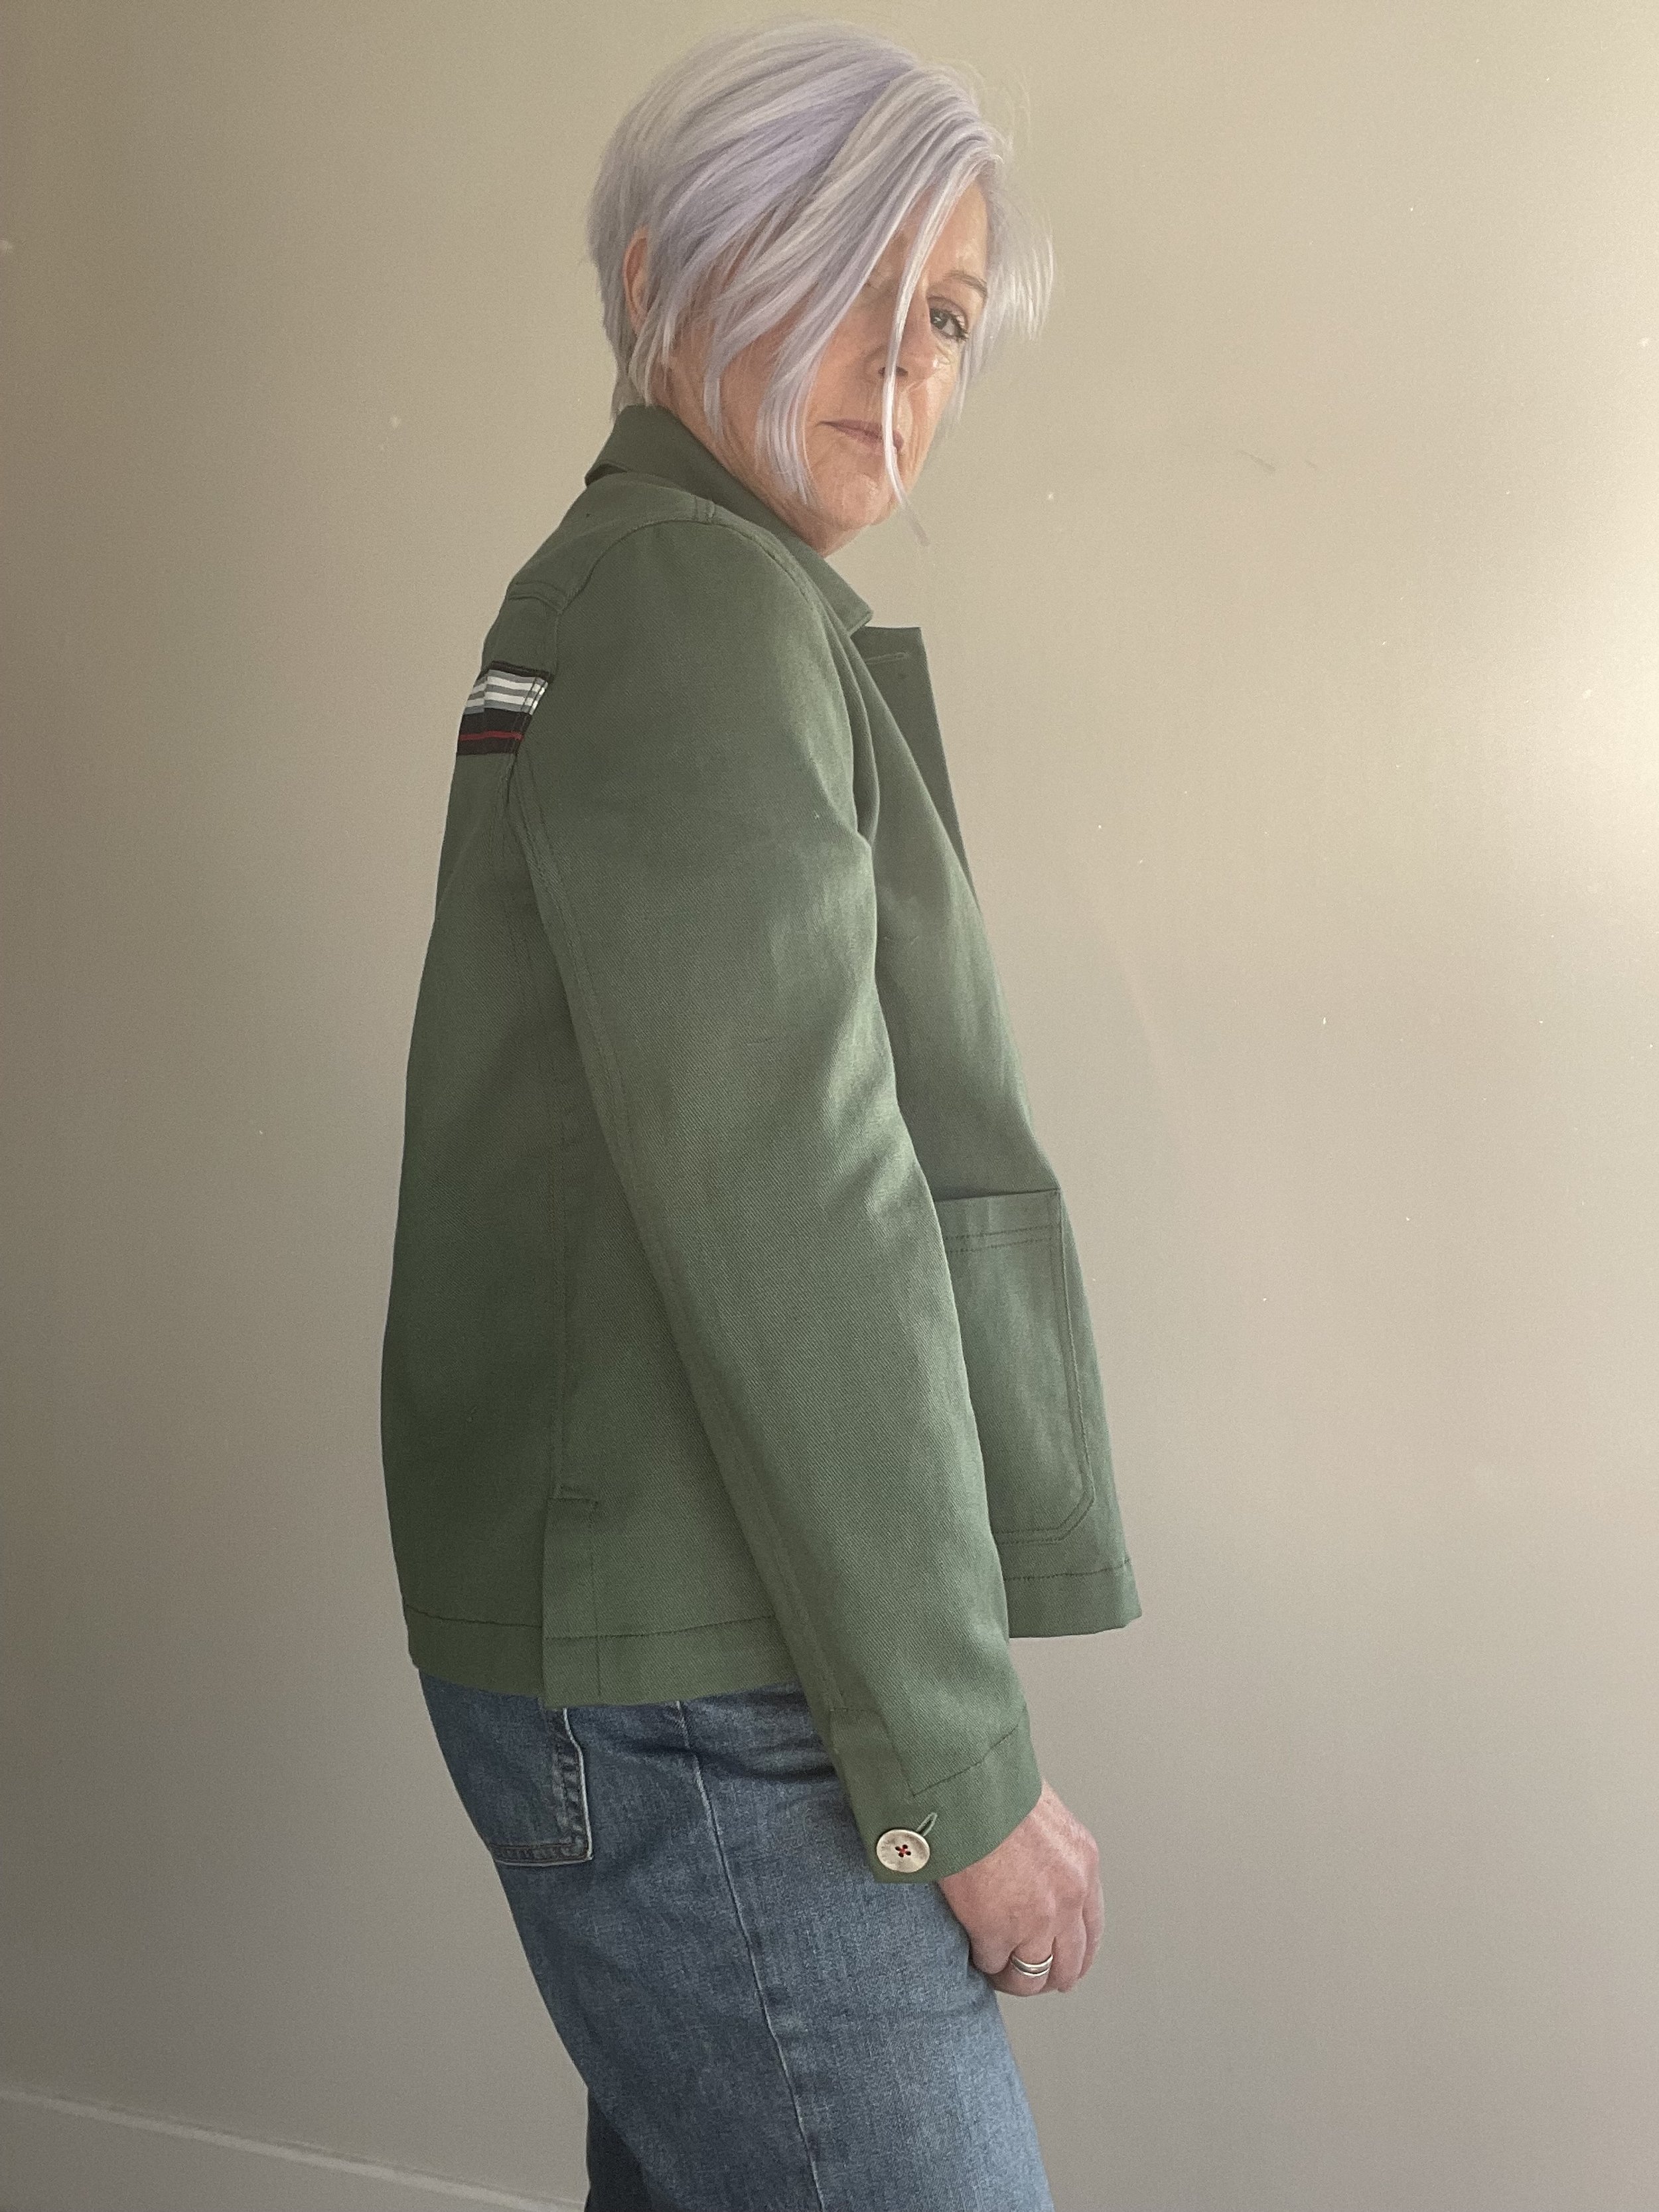
The side vents on the Ottoline are a nice feature
The next step is to construct the side vents, although there is an option to simplify the jacket considerably by omitting these altogether. Merchant & Mills admit that these are a little tricky, but the instructions are excellent so provided you take your time and follow them carefully, you should be fine. Once the topstitching is applied they are a really nice feature of the jacket, so worth persevering with. The side seams sit towards the back of the jacket rather than being at the underarm point and again, this is a nice feature which makes the vents more noticeable. The yoke is not applied until this point. It is stitched to the back and then to the front, and comes forward over the shoulder, so there is no shoulder seam.

Detail of the sleeve vent on the Ottoline. Here the topstitching replicates the image on the cover of the paper pattern, rather than the written instructions supplied by Merchant & Mills
The sleeve vents are very well drafted; all points match precisely to provide lovely mitred corners. At this point I added a square of interfacing ready to reinforce the buttonhole. The top sleeve is stitched to the under sleeve and the vents constructed in much the same way as the side vents. It’s worth pointing out here that the instructions suggest that you topstitch the vent on the topsleeve to the edge; this would mean that when you add the buttonhole it will go over this topstitching. This is not how it appears on the pattern envelope and I would strongly suggest that you follow that for guidance.
The instructions for setting in the sleeves are a bit vague; you are simply told to pin the sleeve into the armhole, right sides together, and then stitch – there is no guidance on what the notches on the sleeve head should match up to, but you do need to be sure that the top sleeve (ie the larger one) is lined up with the front of the jacket – otherwise your sleeves will be back to front! There is some ease in the sleeve head; the pattern doesn’t recommend that you run any gathering stitches around the top of the sleeve to ease it in and, using plenty of pins, I managed without; but this is something to bear in mind. The sleeve seam allowance is then trimmed and snipped, the seam allowance neatened and pressed towards the bodice and two rows of topstitching added.

Here you can just about see how the collar is applied and slightly overlaps the front facing
Okay, so nearly finished. Now – finally – the collar is added. Merchant & Mills recommend that after staystitching the neck edge, you pin one layer of the collar over the staystitching and tack in place. The collar will extend 0.5cm from the snipped point to match the original notch and must dip down by about 0.3cm at the front to make this point stronger and allow for the topstitching. Next you’re supposed to pin and tack the collar inside the jacket and topstitch the collar through all layers to secure in place. I have to admit, I struggled with this and in the end, I sewed the first layer of the collar in place to make it more secure, then pinned and tacked the second layer of the collar inside the jacket before topstitching. I also struggled with the idea of the collar dipping down at the front, over the facing; in my opinion this goes against the more traditional method of sandwiching the collar between the neck edge and the facing which I would prefer. In the end though, it looked better than I expected and I was happy with the end result.
Merchant & Mills recommend the purchase of five 22mm buttons to complete the jacket but, bear in mind that, if you’re adding the sleeve vents, you will need seven buttons. The addition of a grown on facing at the jacket front did make the buttonholes much easier to accomplish as there was no bulk caused by an additional seam.
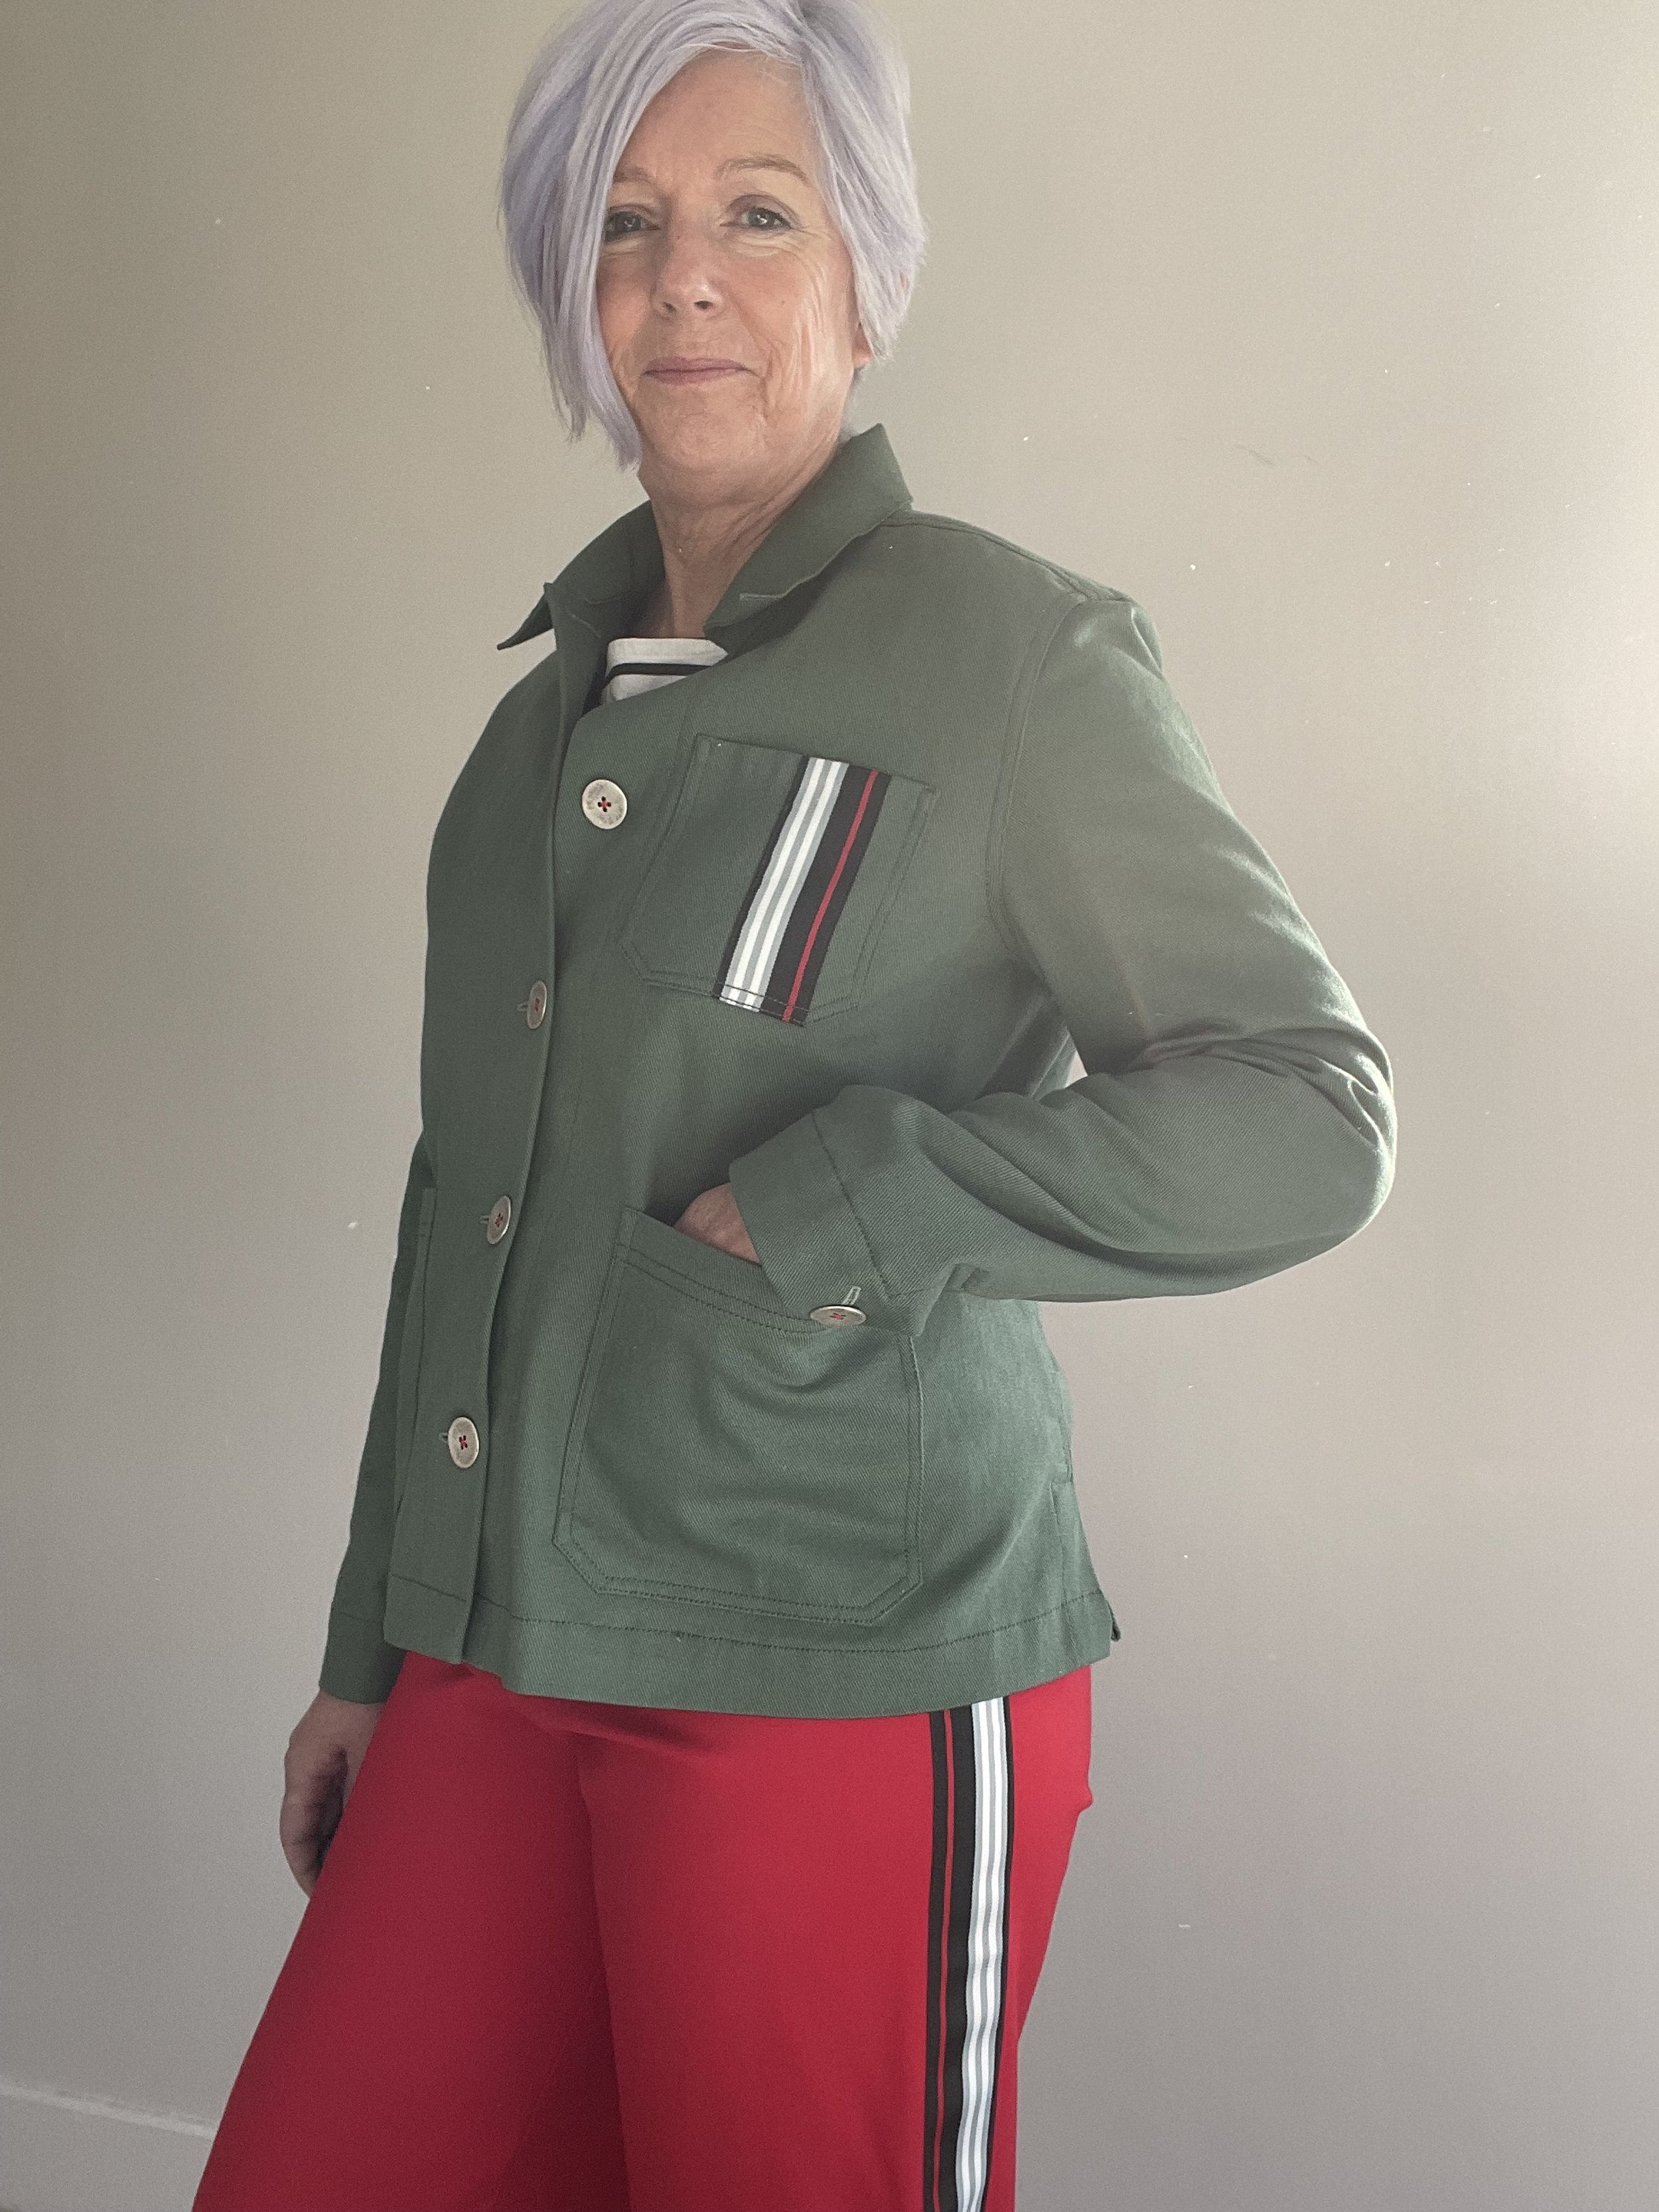
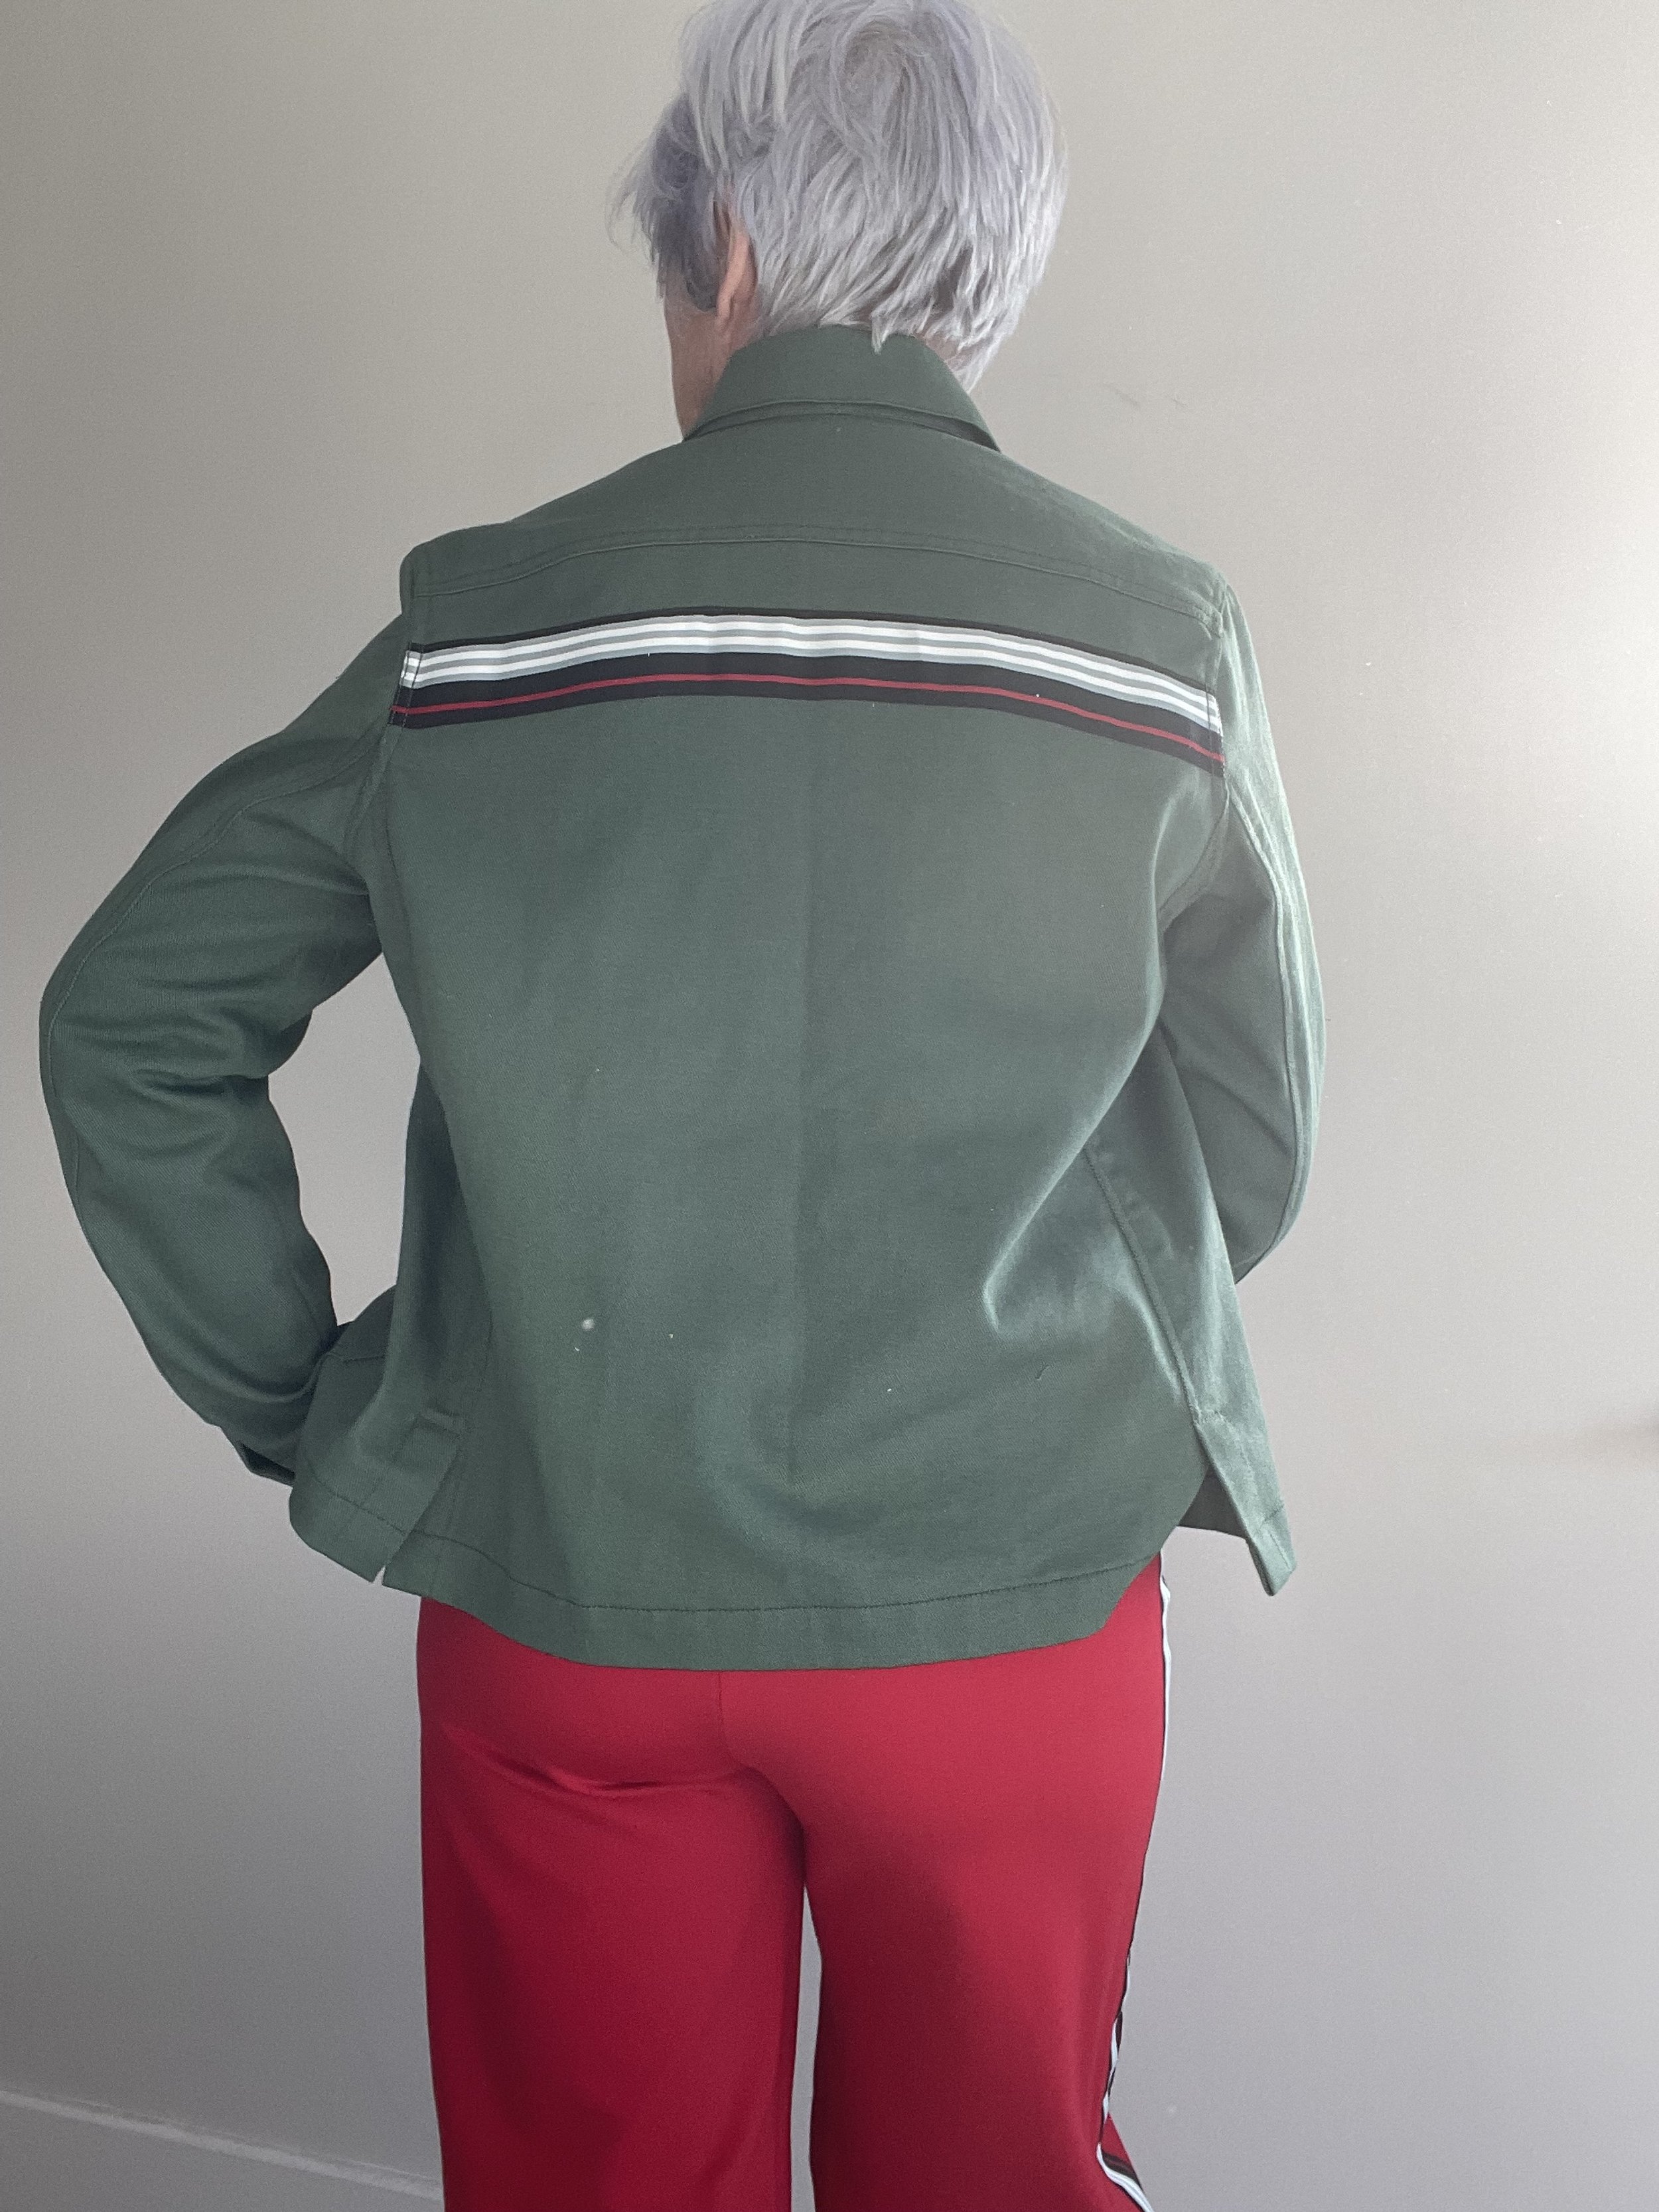
For a unique feature I added a striped grosgrain ribbon to my jacket for a military vibe; this was inspired by a rtw parka introduced by fashion retailer, Mint Velvet several seasons ago. The ribbon was a remnant left over from a previous project and I added it to the breast pocket and across the jacket back in line with the top of the undersleeve seam (originally I’d added it to the yoke but it was way too high)! I played with the military vibe further by adding aged, beaten silver buttons, attached with red thread to pick up the colours within the striped ribbon trim. The buttons were backed by reinforcing buttons for strength. All internal seams were hongkong bound with black bias binding to achieve a neat finish.

Detailed shots of the Ottoline jacket showing, clockwise from left, the finished collar, button detail, grosgrain stripe across the back, sleeve vent and breast pocket
I hope all my comments haven’t put you off the Ottoline. It is a fabulous, versatile jacket and I will be making more of them; next time I may add some length to the jacket and add a belt and belt loops for more of a safari-style. The instructions appear long, but they do allow for versions with and without vents, and – apart from the insertion of the sleeves – I would say they are comprehensive and fairly easy to follow. This is not a quick make – the topstitching guarantees this – but it is not an especially difficult make, you just need to take your time and follow the instructions carefully. An edge-stitch foot is definitely a good investment if you plan on adding a lot of topstitching, and I used a Schmetz topstitch needle and Gutermann topstitching thread in a tonal shade. I made a straight size 12 based on my bust measurement and should have graded out to a 14 for waist and hips, however this was in no way necessary. Merchant & Mills include finished measurements so it is quite clear whether you need to grade out or not. Next time however, I would probably shorten the sleeves by 3cm as these are a little long on me.
I’m really happy with my finished Ottoline. The addition of the striped ribbon achieved the look I was after, the fabric is great quality and the perfect shade of green for me! This lightweight jacket will be perfect for throwing on as warmer weather approaches, or wearing as an additional layer under a heavy coat or jacket. This may be my first Ottoline and a bit of a learning process, but it definitely won’t be my last.
Have you made, or got any plans to make the Ottoline? Let me know in the comments below.
Materials used:
2m Sage green cotton twill from Guthrie & Ghani -112cm wide @£14.50 pm
Striped 38mm grosgrain ribbon - £1.65pm Ebay - bluesiamese6
Aged silver grey beaten metal industrial 4-hole buttons £2.99 for 10 Ebay - number-sixty
Thread - Gutermann 100% polyester, col 296. Topstitching thread Gutermann 100% polyester, col 269